Add and edit every DNS record type NameBright supports, change your nameservers, set up subdomains and URL forwarding, and turn on DNSSEC.
Set Up URL Forwarding
GUIDE-7.12 · 2 min · Updated September 2026
URL forwarding sends visitors from your domain to a different address. You can show them the destination directly, or keep your own domain visible in the address bar while showing the destination's content.
URL forwarding only works while your domain uses NameBright's nameservers. If you've pointed the domain elsewhere, see Change a Domain's Nameservers first.
Log in to your NameBright account.
Go to Domain Manager and select a domain.
Under the URL Forwarding section, select Manage URL Forwarding .
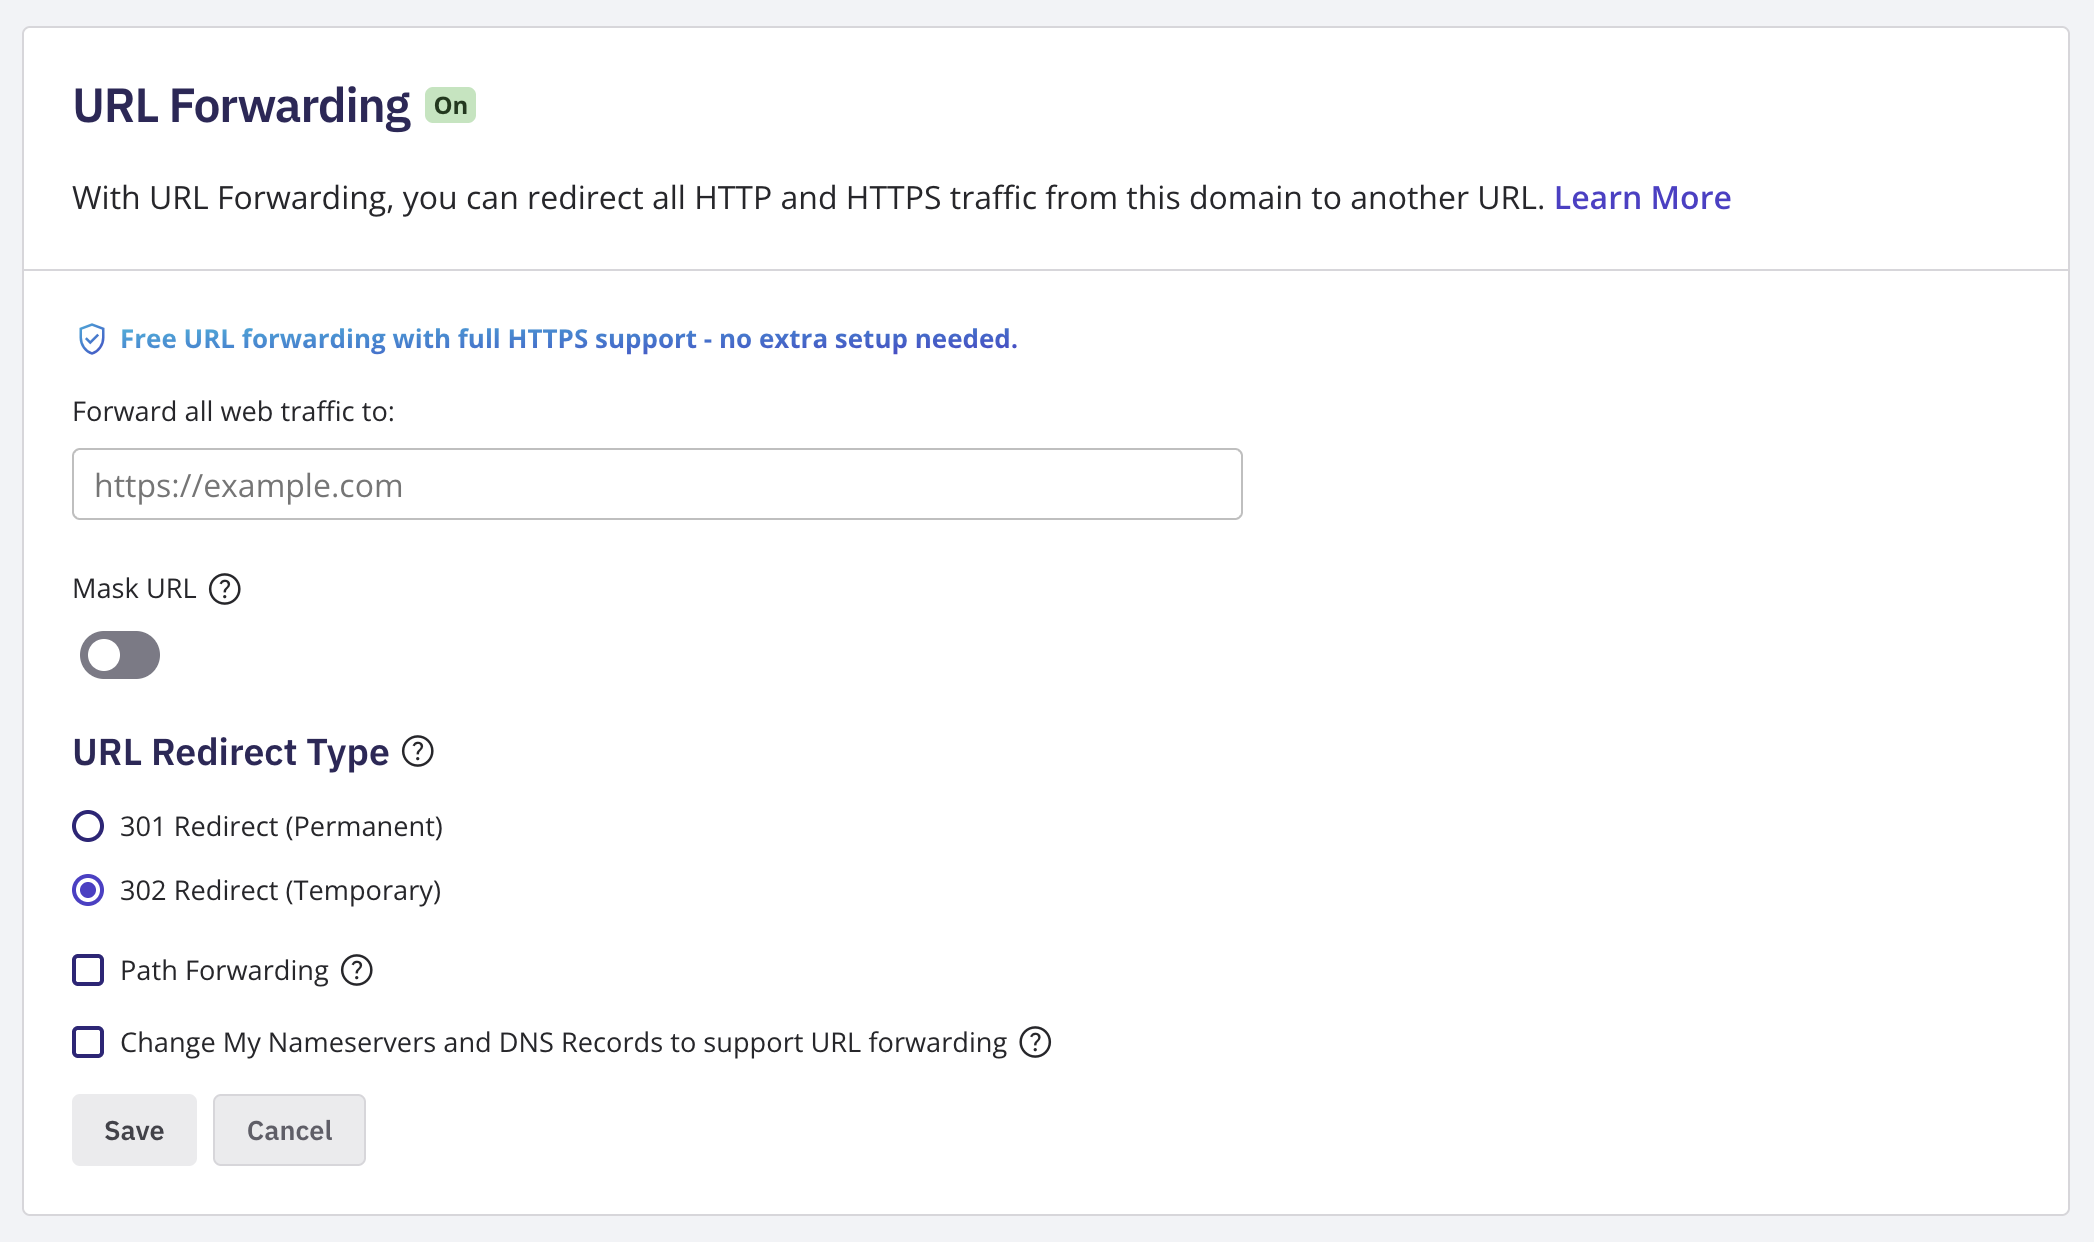
Enter the destination address in Forward All Web Traffic To .
Choose whether to turn on Mask URL . With Mask URL on, visitors continue to see your domain in the address bar. With Mask URL off, visitors are redirected to the destination's actual address, and two more options appear: URL Redirect Type ( 301 Redirect (Permanent) or 302 Redirect (Temporary) ) and a Path Forwarding checkbox.
Check Change My Nameservers and DNS Records to Support URL Forwarding . NameBright requires this because forwarding works by changing your nameservers and DNS records.
Save your changes.
Update URL Forwarding in Bulk
To manage URL forwarding on multiple domains at once, go to Domain Manager , switch to Advanced view, and select the domains you want to edit. Once at least one is selected, the bulk action buttons above the domain table become active. Select the URL Forwarding bulk action button, then edit the setting the same way you would for a single domain. Save your changes. NameBright applies the update to every domain you selected.
Update URL Forwarding on a Category
To manage URL forwarding for every domain in a category at once, go to My Categories , select the category, open Category Settings , and enable URL Forwarding there, then edit the setting the same way you would for a single domain. Save your changes.